EVK Getting Started Guide
Overview
This page will guide you step-by-step through the process of getting your FMLR evaluation kit (EVK) up and running. All EVK are delivered with preloaded firmware which is also available for download.
To bring up your EVK a working LoRaWAN® gateway, such as a miro Edge, is up and running and registered with a LoRaWAN network server (LNS). Within this guide, we will use loriot. You can register a free account and register your gateway.
Evaluation Kit Content
The EVK contains:
- Module on carrier board with on board J-Link programmer
- Antenna(s) with U.FL connector (LR11xx based modules have multiple antennas)
- USB cable to power the board and connect to programmer and virtual COM port
Getting started
Follow these simple steps to bring up the EVK and receive data on the LoRawAN® network server.
1. Get your keys
To register the EVK device with the LoRaWAN network server, device id and keys are needed.
Follow the guide to retrieve your keys from the Miromico DevEUI database. Use the UUID on the label on the back of the EVK box.
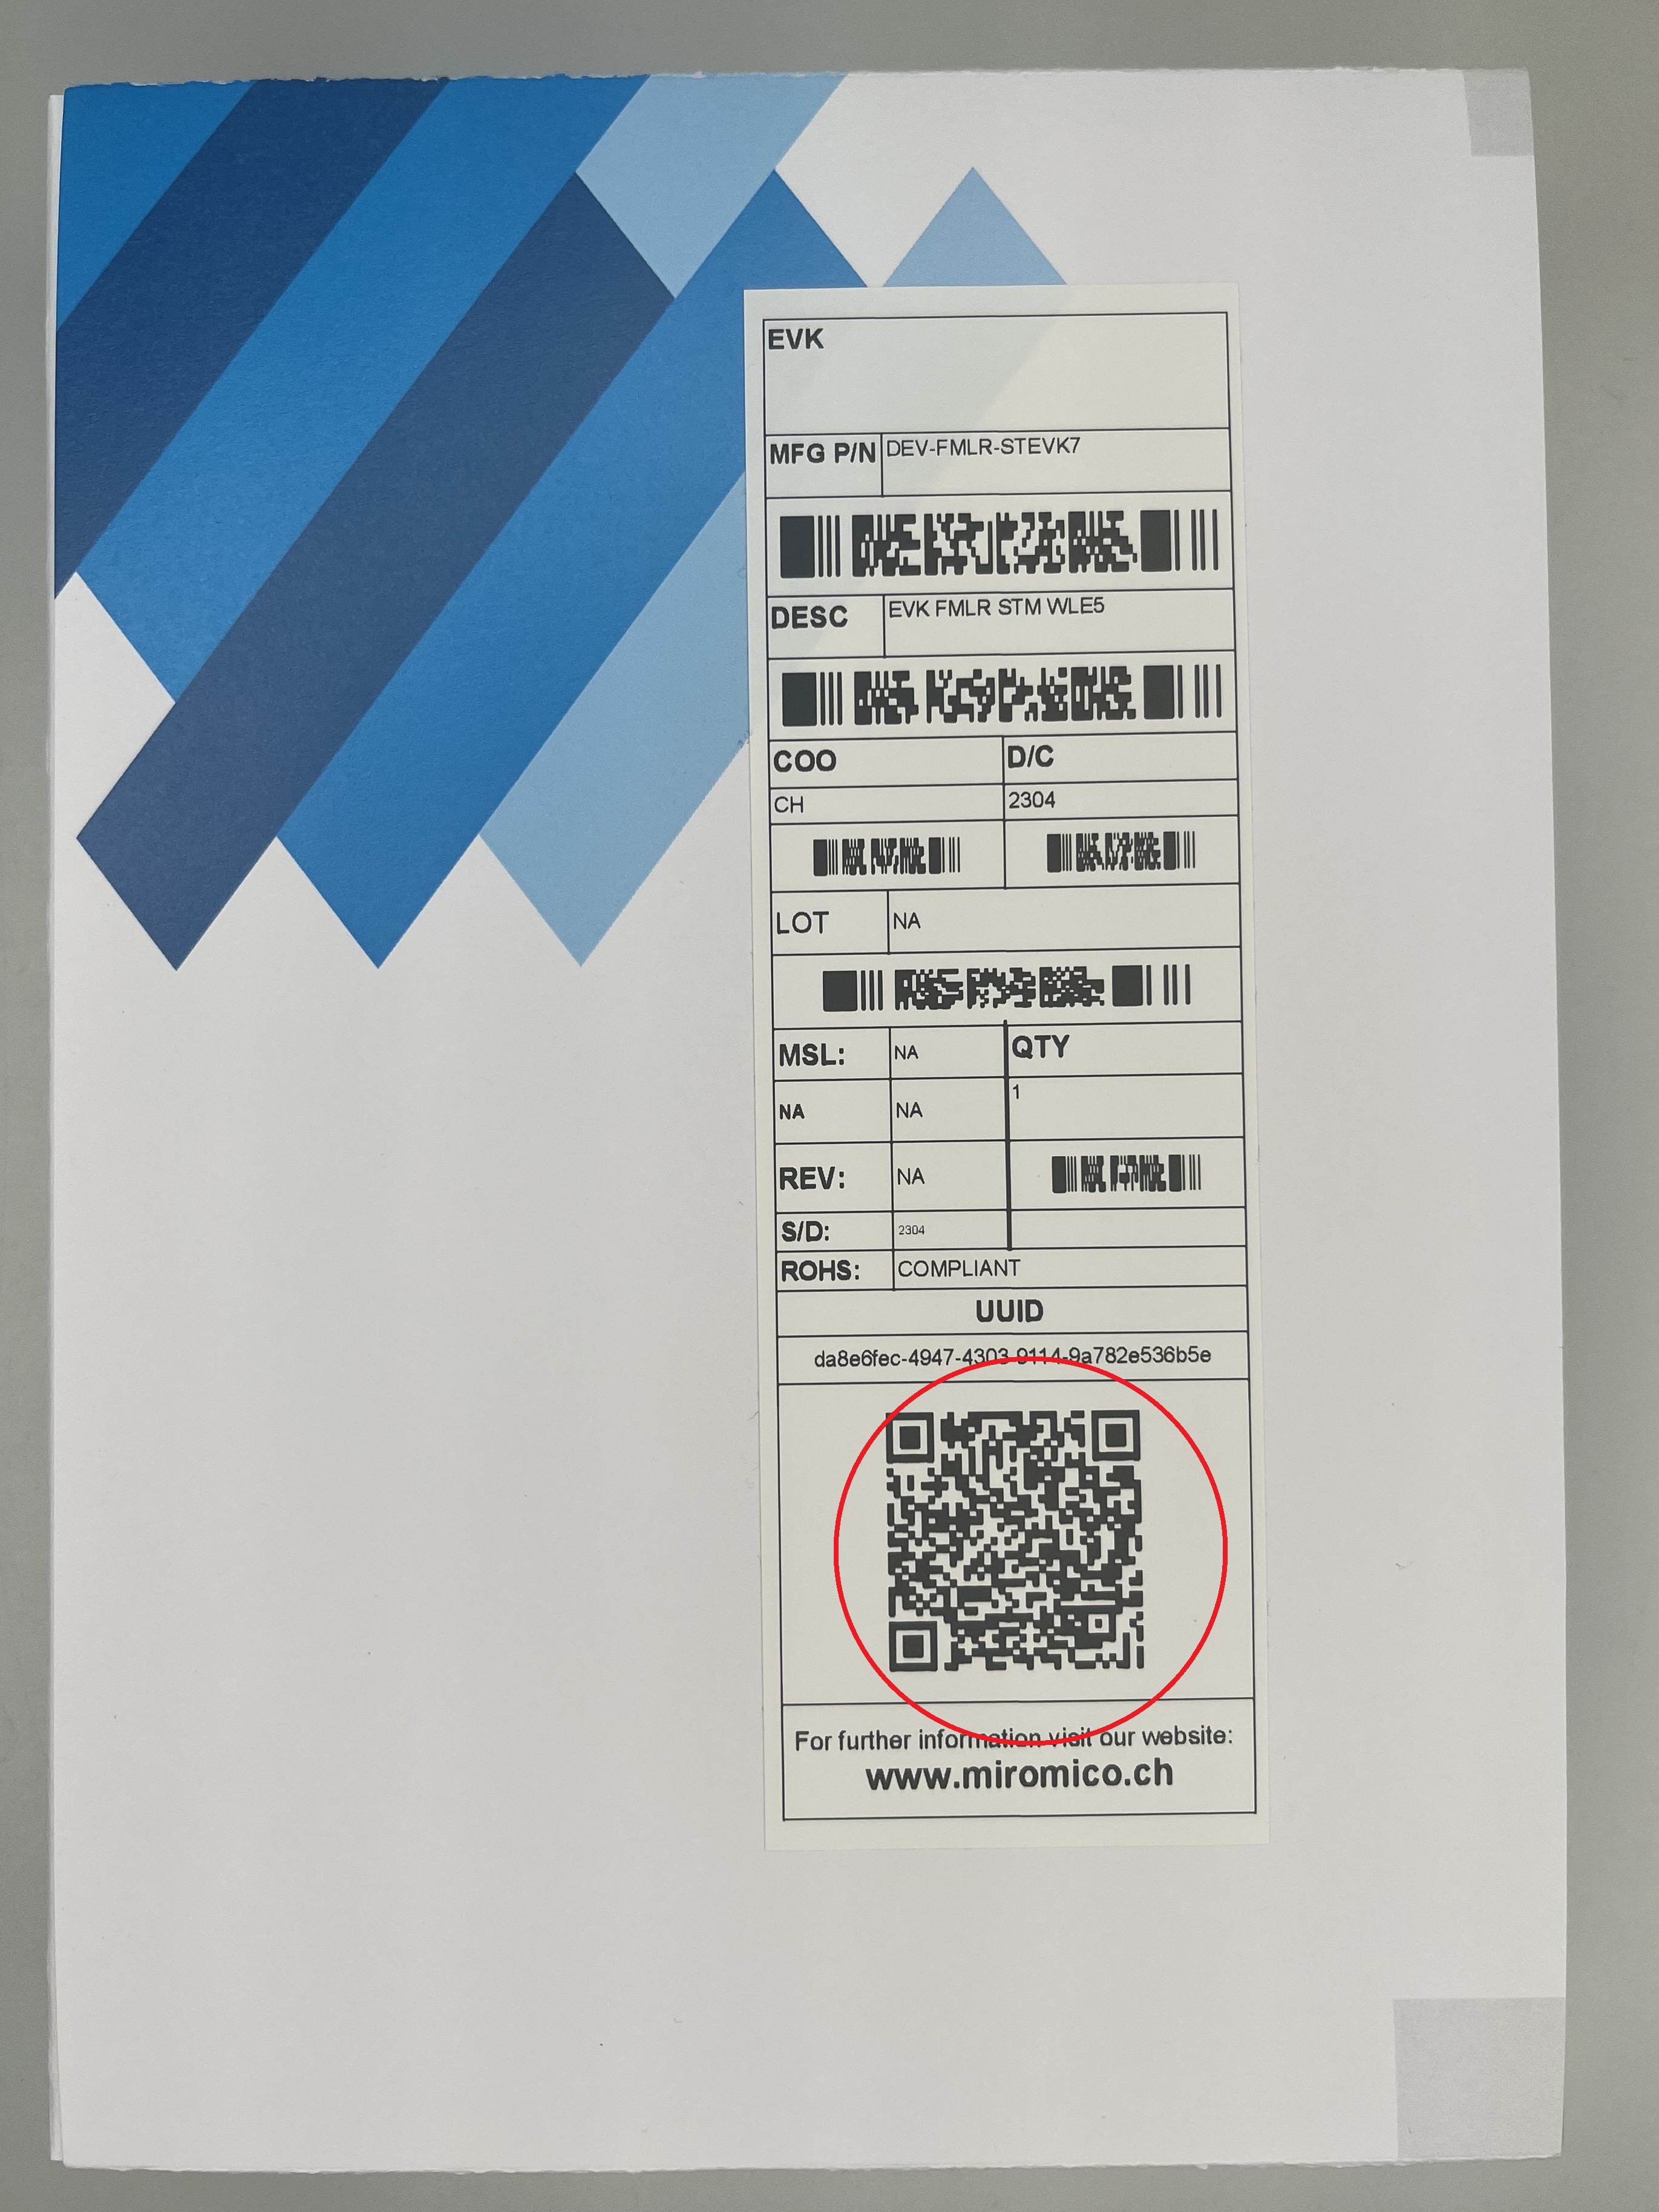
The DevEUI for the module, which is required to claim the keys, can be found on the back of the module board.
From the DevEUI database you will receive the following three keys:
- DevEUI
- AppEUI or JoinEUI
- AppKey
You will need those keys to register your device with the LNS
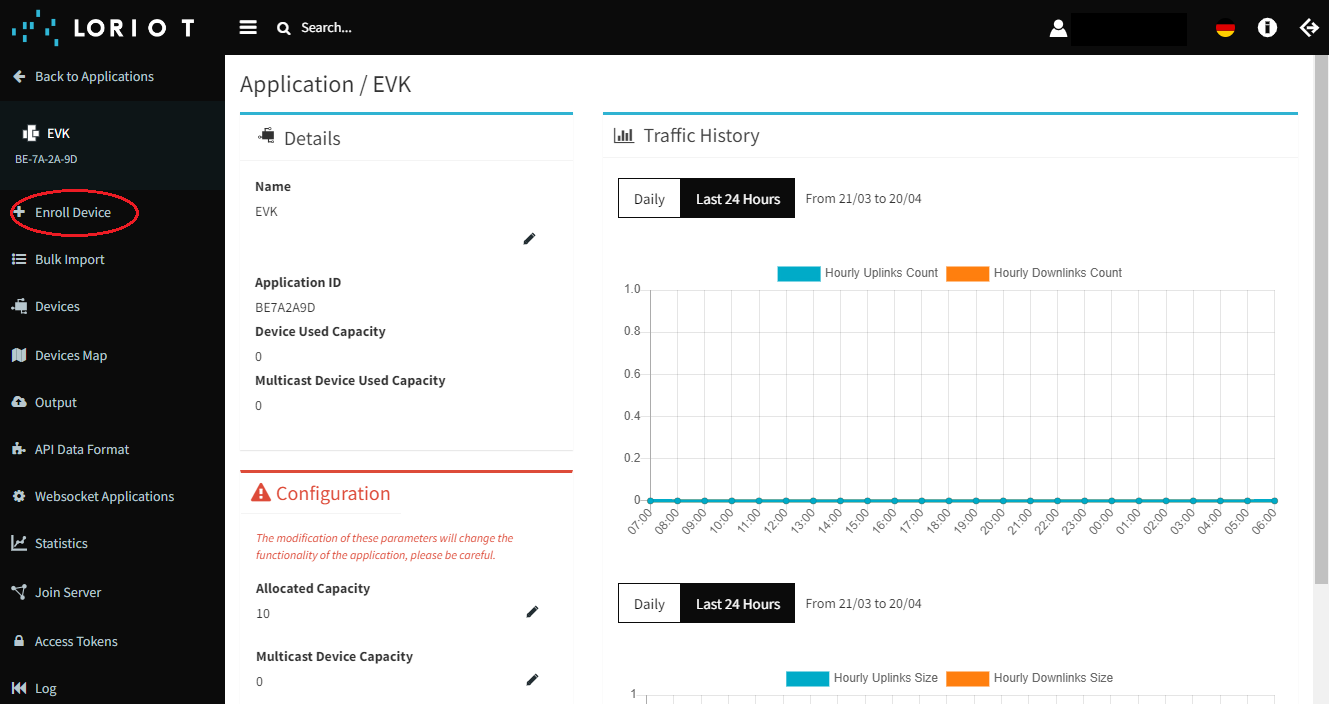
2. Register your device
To register your device on an LNS, you typically have to create an application. In your loriot account, click on + Enroll Device
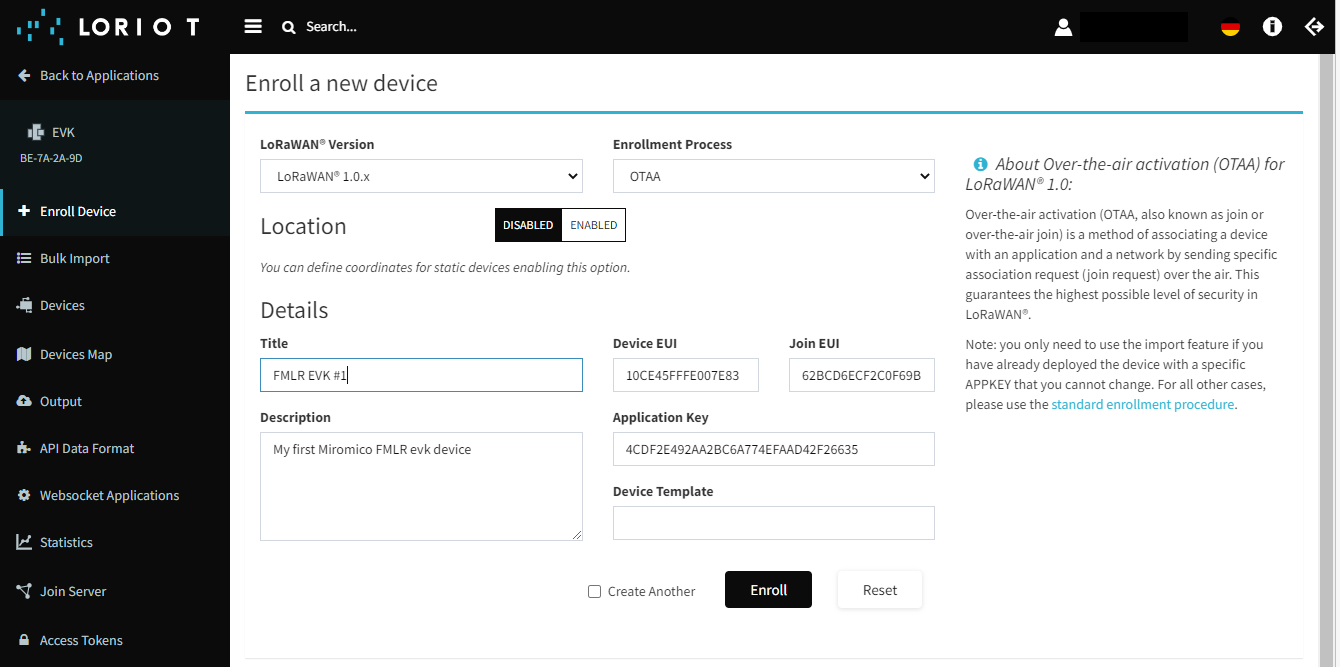
Fill in all information about your device. Typical information is:
- Device name or title: Any name to identify your device. In some LNS, this name needs to be unique with some limitations on characters you can use
- DevEUI, JoinEUI (AppEUI) and Application Key (AppKey): Device registration keys you gathered in step 1
- LoRaWAN® version: Select 1.0.x. Our devices are Version 1.0.4 so select closest available option
- Frequency plan: Go with default settings for the region of your kit
- Enrollment Process or Activation: Select OTAA (over-the-air-activation)
3. Prepare your EVK
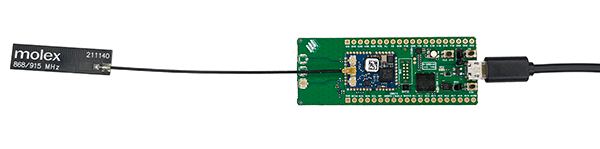
Connect the SubG antenna (868/915 MHz molex 211140) to the U.FL connector. Use the (middle) connector on the EVK board, if available, or connect it directly to the (middle) connector on the module. Make sure it is properly connected.
Note
LR1110 based EVK have three U.FL connectors. Make sure you are using the middle one for SubG LoRaWAN!
Also connect the USB cable on the mini-USB connector of the EVK.
4. Power Up the EVK
Your device and the LoRaWAN® gateway are now properly registered. The gateway is up and running and within reasonable range. The EVK is set up.
Plug the EVK into a USB power supply or USB port of your computer. The device will power up and the LEDs will blink:
- LED on module will blink for 0.5 sec
- RGB LED will blink red for 0.5 sec
- RGB LED will blink green for 0.5 sec
- RGB LED will blink blue for 0.5 sec
After that, the device will join and send a first message. You will see device messages on the LNS.
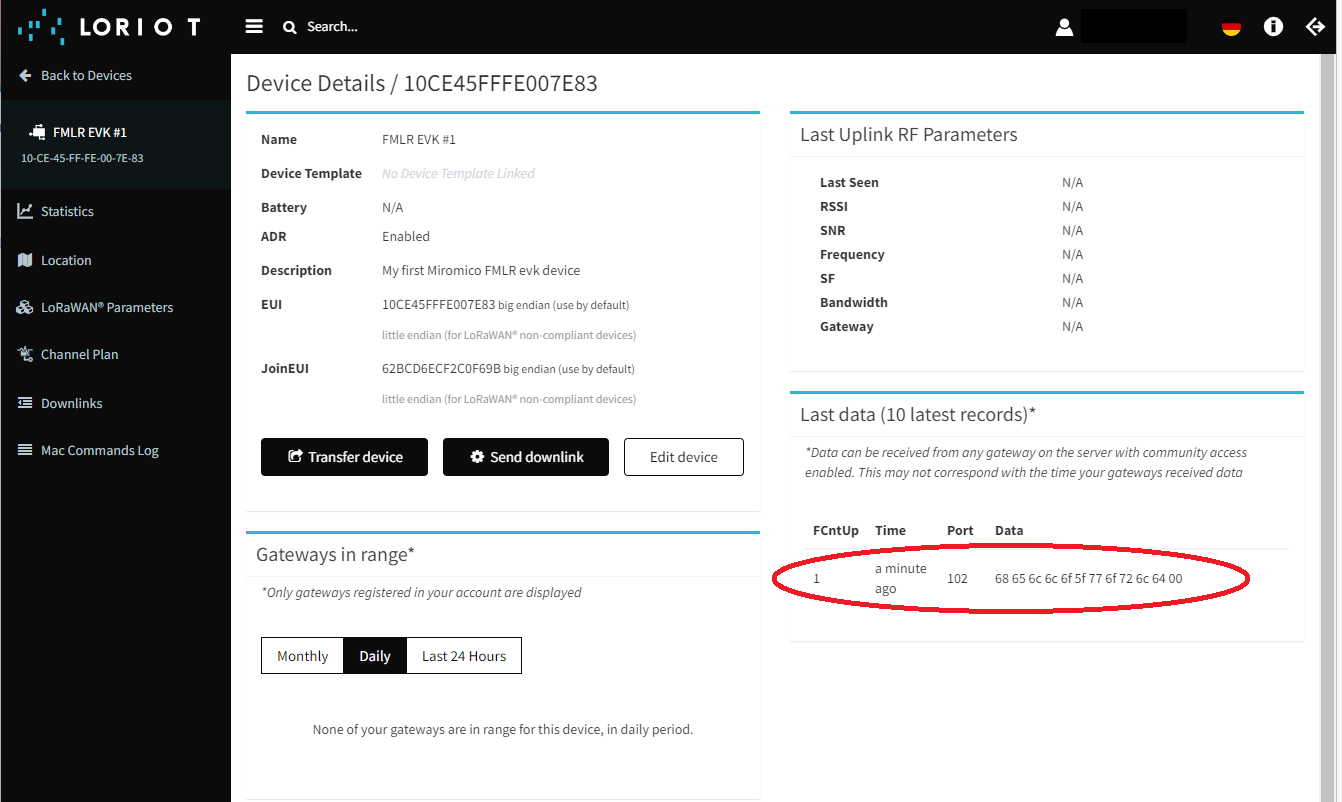
The device will now send messages in a regular interval. See payload description for more details.