Quick Start Guide
This document details the step-by-step instructions for setting up the miro TrackIt and the miro TrackIt PoC Kit and configuring it in the LoRa Cloud™ Locator web app.
Please note that as part of the tracker’s configuration, you will need to decide whether you can use a public network to connect your tracker (miro TrackIt only) or if you want to set up your private network. To answer this question, you have to validate if the geographical area where you expect your tracker to operate is inside the coverage area of the public network operators currently supported by LoRa Cloud Locator.
If you are okay with the public network option, you can directly order your tracker (EU 868 or US915) and use your public network of choice. However, if your area of interest is not currently served by any of the public network operators supported by LoRa Cloud Locator, then you should acquire a miro TrackIt PoC Kit to set up your own private network that will serve your trackers using AWS IoT Core for LoRaWAN® and you can refer to the Gateway Getting Started Guide for details on how to add these to LoRa Cloud Locator.
Follow the below steps to set up and add your tracker to LoRa Cloud Locator.
1. Order a tracker
Order a tracker or a PoC kit from one of our distributors
| Order code | Description |
|---|---|
| TRACK-TRACKIT-LW/EU868 | miro TrackIt, LR1110, LoRaWAN®, GNSS, passive WiFi AP MAC address scanner, BLE 5.2, IP65 |
| TRACK-TRACKIT-LW/US915 | miro TrackIt, LR1110, LoRaWAN®, GNSS, passive WiFi AP MAC address scanner, BLE 5.2, IP65 |
| POC-KIT-LW/EU868-TRACKIT | PoC Kit: LoRaWAN gateway, EU868, ETH, PoE; miro TrackIt |
| POC-KIT-LW/US915-TRACKIT | PoC Kit: LoRaWAN gateway, EU868, ETH, PoE; miro TrackIt |
2. Connect the Gateway
If you ordered a PoC kit, connect your gateway to the internet and power it up. There is no registration needed – it’s plug and play
If you just ordered a miro TrackIt device, make sure you have LoRaWAN network coverage.
3. Set up the tracker
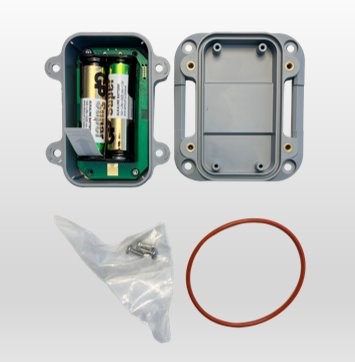
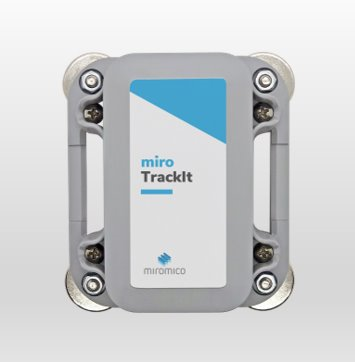
Unbox your tracker. It includes the following parts:
- Enclosure top/bottom
- Screws
- Sealing
- Batteries
Insert the sealing into the enclosure bottom.
Retrieve and copy the LoRaWAN® device EUI, LoRaWAN Join EUI and PIN code attributes from your tracker (you will use these in the next step).
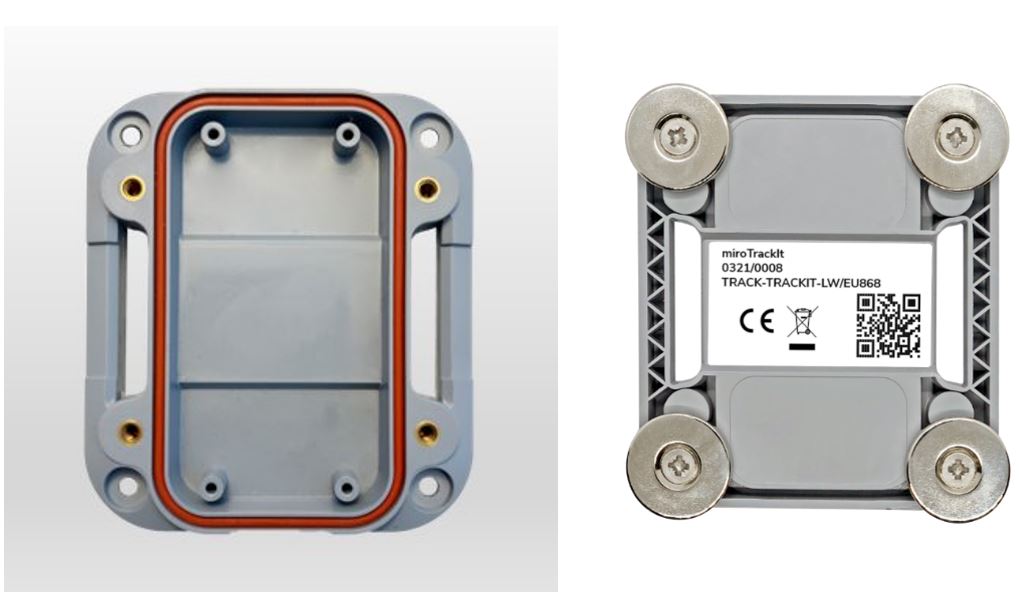
Scan the QR code on the bottom of the tracker. The QR code contains the following information:
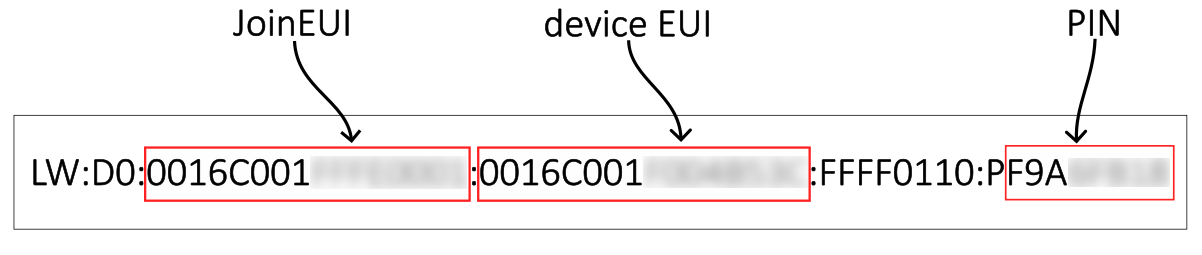
Important
The JoinEUI, Device EUI and the PIN code are mandatory for the next few steps. The QR code follows the definition of the LoRaWAN alliance
4. LoRa Cloud™ Locator registration
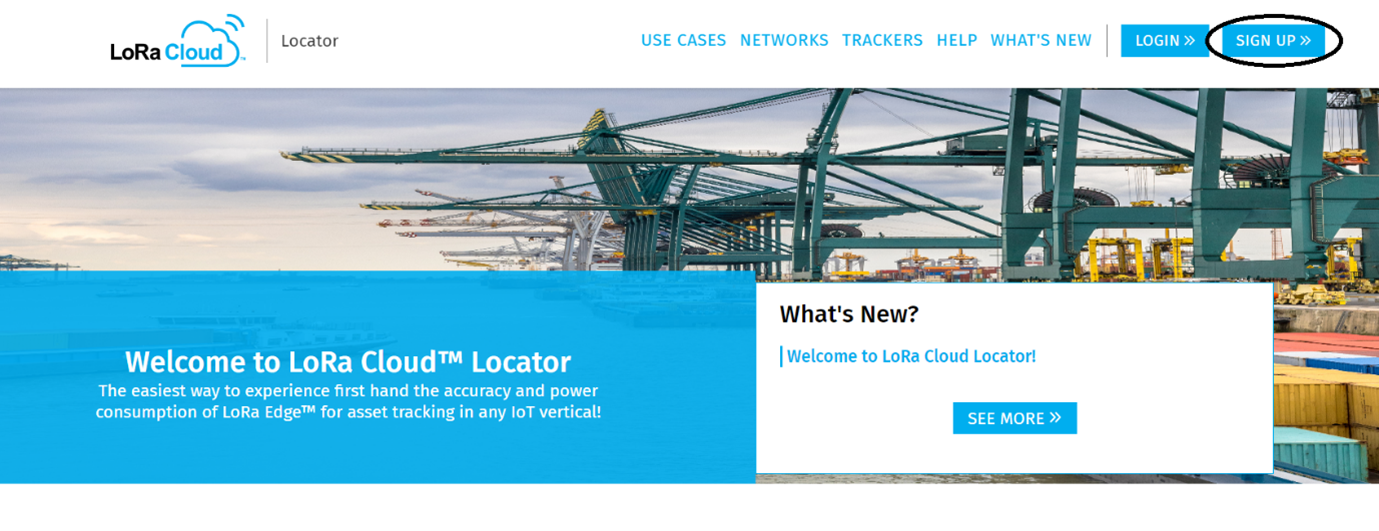
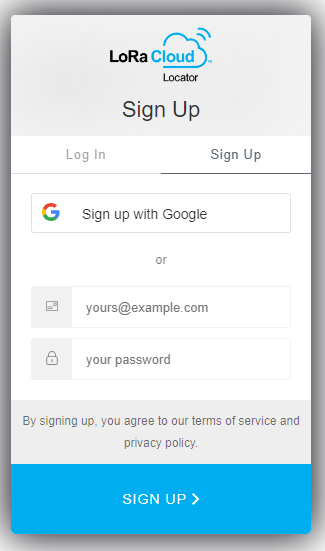
As a next step you need to register the tracker with the LoRa Cloud™ Locator web app. Go to Semtech LoRa Cloud webside and create an account. Provide your email and password and click the sign up button.
Confirm your account registration by checking your email and clicking on the validation link included in the email.
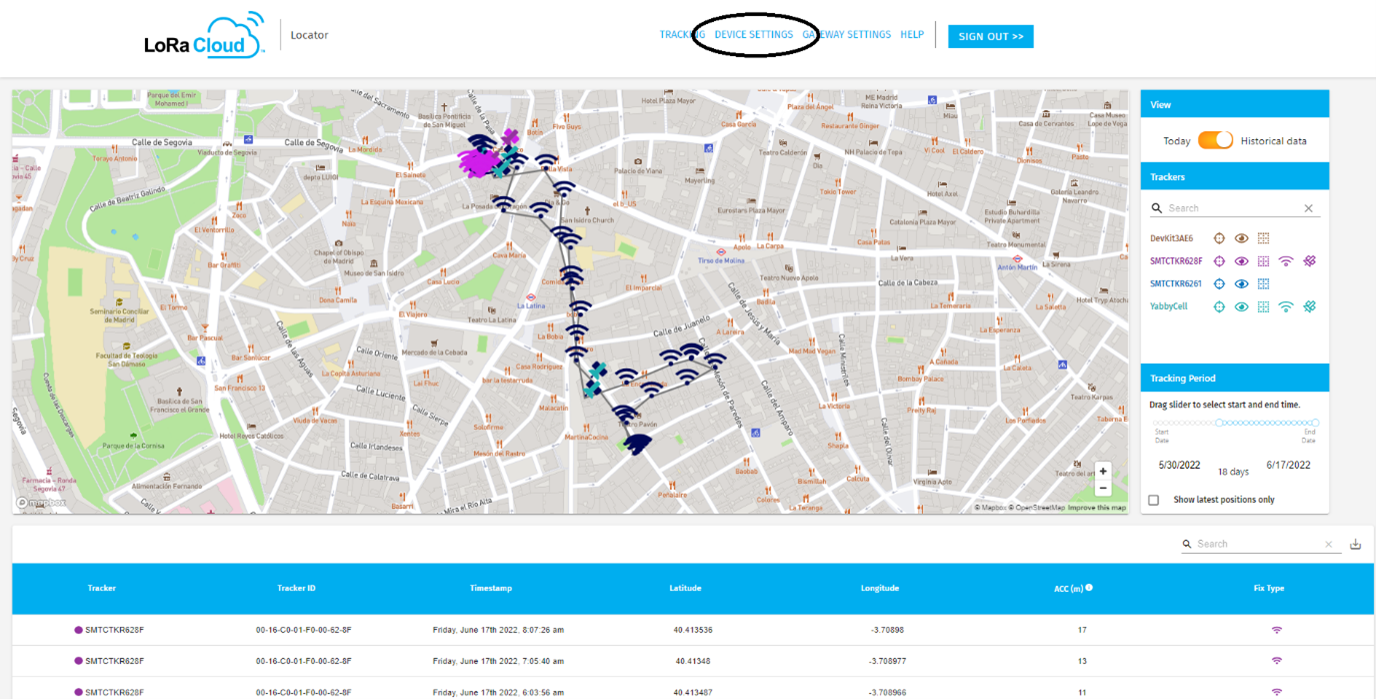
Login into Semtech LoRa Cloud webside
Select the Devices Settings section by clicking on the link.
Under the Devices Settings section of the web app, click on Add New Device.

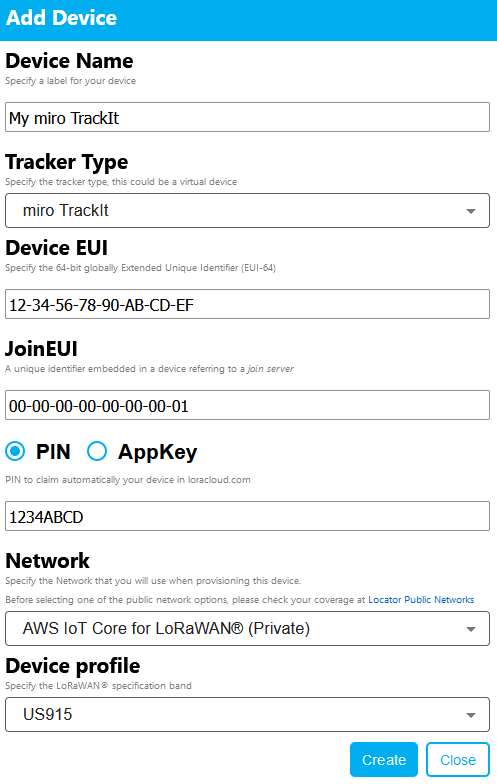
In the new device popup window, provide the following information (please note the values in the picture below are only for informative purposes):
- Device Name: Enter a friendly name for your tracker
- Tracker Type: Select miro TrackIt
- Device EUI and Join EUI: Enter the value extracted form the QR code of the back of the device, including the '-' characters
- Select PIN and enter the value extracted form the QR code of the back of the device
- Based on your use case and location, specify the Network you want to use
- To use the miro TrackIt SPOC Kit, you have to select AWS IoT Core for LoRaWAN where your GW is registered, then based on your location, select the right LoRaWAN frequency band for the Device profile
- If you plan to use your device on a public LoRaWAN network, you should select the network operator that provides the right coverage for the geographical area in which your device will be used. Some network operators (for example, Everynet) will also request specific band selection under the Band dropdown.
Click on Create to finalize the registration. You should now see the new Tracker added to the list of devices (please be aware this process can take up to 15 seconds. Do not click a second time).
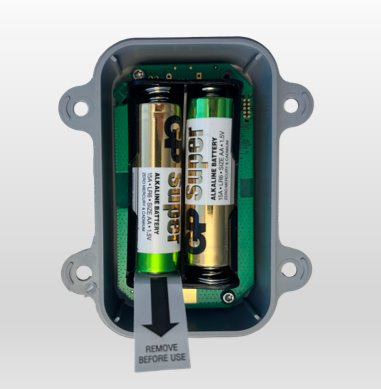
5. Activate the miro TrackIt
Activate and power up the miro TrackIt by pulling out the battery isolation tap. The device will immediately start the LoRaWAN join procedure.
Tracker will beep with a single high tone with every join attempt and will beep with two short high tones upon join success.
In case of an error, the tracker will beep a long low tone twice. If the LoRaWAN® network is joined the tracker will beep once.
After the successful initialization the tracker will beep a melody once.
6. Tracker Assembly
Close the housing by tightening all four screws firmly.
Start using your tracker by moving around (ensure you are within the coverage area of the selected network operator) and check your dots on the map
- Login into LoRaCould
- Select the Tracking section by clicking on the corresponding link to start seeing the dots corresponding to your registered trackers' positions over time
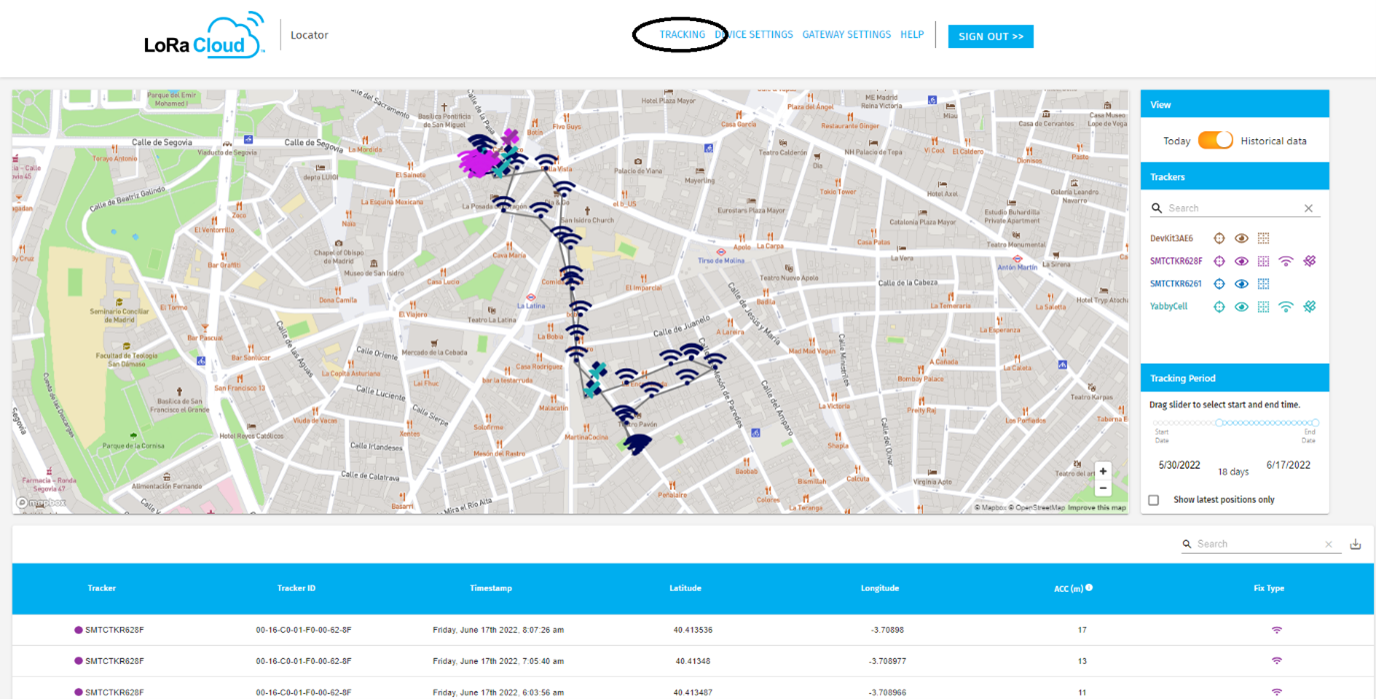
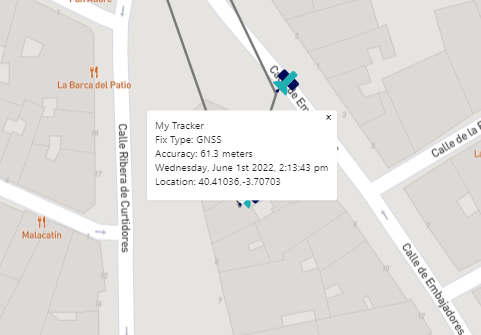
You can use the map navigation controls to move around and zoom in and out. You can also use the Tracker Period controls to determine what position data you want to render on the map from a time perspective (only the last position or a specific time interval). If you want to control which trackers you want to show/hide and center the map based on tracker positions and show the path between these positions, you can use the Trackers controls. Finally, in the lower section of the page, you can see a complete list of all the jobs that match the filter criteria as detailed before.
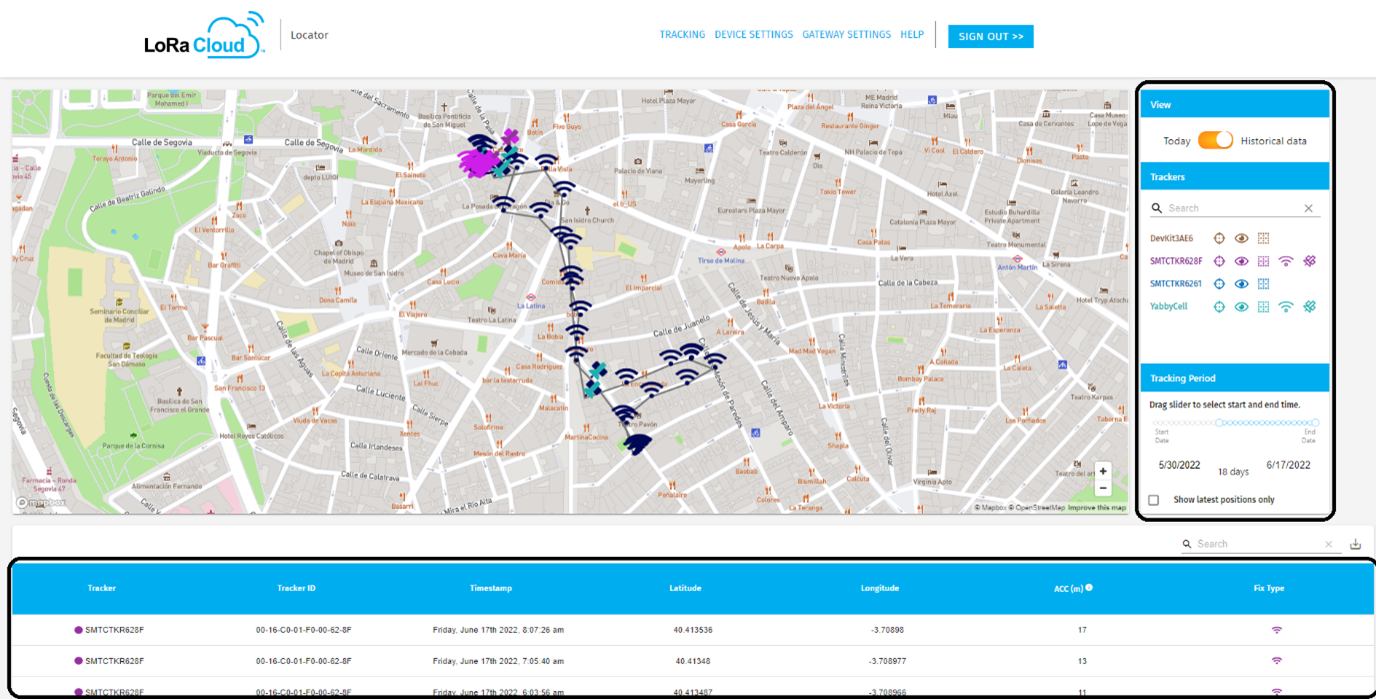
If you want to see the full details (latitude/longitude, accuracy, fix mechanism used and timestamp), select the dot on the map, and a popup will display these details.